
Edible Gardening
Step-by-Step Guide to Growing Microgreens Indoors
Looking to add fresh, nutritious greens to your meals year-round? Discover the art of growing microgreens indoors!
From busy urban dwellers to aspiring chefs, cultivating these tiny powerhouses at home is a game-changer.
By following a few simple steps, you can transform your kitchen into a vibrant microgreen garden, providing an innovative and sustainable source of superfoods.
Whether you’re experimenting with peppery arugula or vibrant beet greens, the process is accessible and rewarding.
Get ready to elevate your culinary creations and embrace the joy of homegrown microgreens – all from the comfort of your own space.
Choosing the Right Seeds
When choosing seeds for growing microgreens indoors, start by considering the types of greens you enjoy eating the most. Explore a variety of seed options such as broccoli, kale, radish, and arugula, which are known for their rich flavors and nutritional benefits.
Different seed varieties offer unique tastes and textures, allowing you to experiment and discover new flavors to elevate your dishes.
Once you have chosen the seed varieties that align with your preferences, focus on the germination process. Ensure that the seeds are properly rinsed and soaked to kickstart the germination process effectively. This step is crucial as it sets the stage for healthy growth and guarantees a bountiful harvest of flavorful microgreens.
Selecting the Ideal Growing Container
To cultivate your chosen microgreen seeds effectively, select a suitable growing container that provides ample space for growth and proper drainage. There are various container options for growing microgreens indoors, each with its own pros and cons.
For instance, shallow trays are great for growing a variety of microgreens and are easy to manage, but they may require more frequent watering. On the other hand, planting individual microgreens in small pots allows for personalized care but can be more labor-intensive.
When considering indoor microgreen container sizes, opt for containers that are at least 2 inches deep to accommodate the growth of roots and provide stability for the plants. Additionally, consider the available space in your home and choose containers that fit your indoor gardening setup while allowing for adequate air circulation.
Preparing the Growing Medium
When preparing the growing medium, you need to ensure that it’s well-suited for the specific needs of your chosen microgreen seeds. Start by selecting a high-quality, sterile seed-starting mix or a soilless medium to provide the best conditions for your microgreens. These mediums offer excellent moisture retention and aeration, crucial for the successful growth of microgreens.
Pay attention to watering frequency and soil moisture to maintain the ideal growing conditions. Overwatering can lead to mold and mildew issues, while underwatering can hinder growth.
Additionally, consider fertilizer application to ensure adequate nutrient levels for your microgreens. Look for a balanced, water-soluble fertilizer and follow the instructions for dilution and application to provide the necessary nutrients for healthy growth.
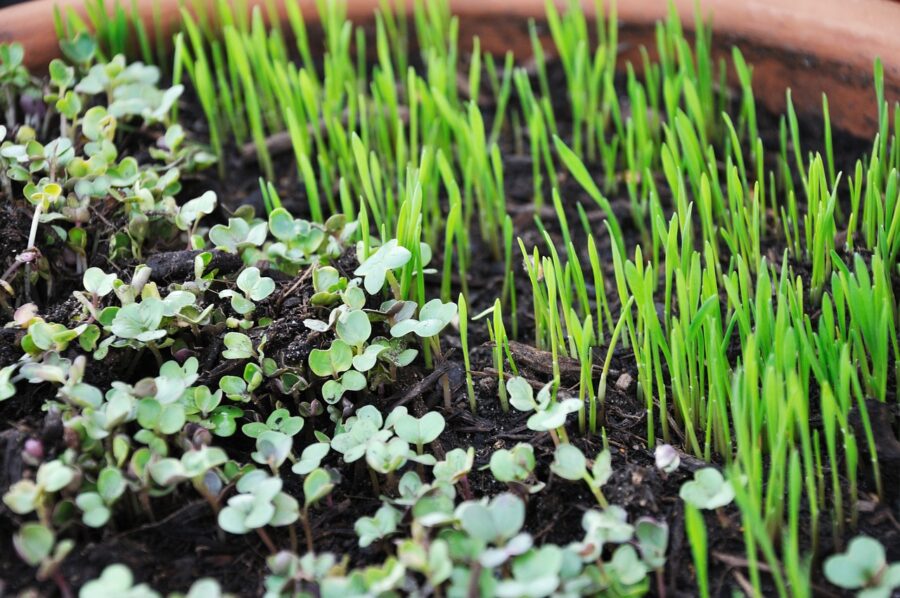
Planting the Microgreen Seeds
Now it’s time to get your hands dirty and plant those microgreen seeds.
Whether you’re using soil or a hydroponic system, it’s important to make sure the seeds are planted at the proper depth for optimal growth.
Let’s take a closer look at the best practices for sowing your microgreen seeds and ensuring they’ve the best possible start.
Soil or Hydroponic
You’ll need to decide whether to plant your microgreen seeds in soil or go the hydroponic route for optimal growth.
Each method has its own benefits. Soil-based growing provides a more natural environment for the plants, allowing them to access essential nutrients and microorganisms. It’s also a simpler and more traditional approach that may appeal to those who prefer a hands-on gardening experience.
On the other hand, hydroponic systems offer precise control over nutrient levels and water distribution, leading to potentially faster growth and higher yields. They also require less space and can be more easily tailored to fit into indoor environments.
When considering the soil vs. hydroponic comparison, think about your preferences, available space, and the level of control you desire over the growing conditions.
Proper Seed Depth
To achieve successful germination, plant the microgreen seeds at a depth of approximately 1/4 to 1/2 inch in the growing medium. When planting the seeds, follow these steps for optimal results:
- Gently sprinkle the seeds over the moist soil, ensuring even coverage across the entire surface.
- Lightly press the seeds into the soil using a flat object to secure them in place without burying them too deeply.
- Mist the seeds with water to ensure the soil moisture is maintained at an optimal level for germination.
By following these steps, you can promote seed germination and create an ideal environment for the microgreens to thrive.
Monitoring the soil moisture and ensuring proper seed depth will contribute to the successful growth of your microgreens.
Providing Adequate Light
To ensure your microgreens receive adequate light, place them in a location that gets at least 6 hours of direct sunlight per day or use a grow light for 12-16 hours daily. Light intensity and duration are crucial for the healthy growth of microgreens. Here’s a comparison of natural sunlight and grow lights:
| Natural Sunlight | Grow Lights |
|---|---|
| Varies with weather conditions | Consistent light intensity |
| Free source of light | Initial investment required |
| Contains full spectrum of light | Can be adjusted for specific light spectrum |
| Limited to certain locations | Can be used anywhere indoors |
Whether you choose natural sunlight or grow lights, providing the right light conditions is essential for successful microgreen cultivation. Consider the specific needs of your microgreens and the available lighting options to create an optimal environment for their growth.
Watering and Humidity Control
For optimal growth of your microgreens, ensure consistent moisture levels by watering them regularly and controlling the humidity in their environment.
Here are some essential tips for watering and humidity control:
- Watering Techniques: Use a gentle, fine mist when watering your microgreens to avoid disturbing the delicate seeds and seedlings. Consider using a spray bottle or a watering can with a fine nozzle to evenly distribute water without causing damage.
- Humidity Levels: Maintain the appropriate humidity levels by covering the growing containers with a clear plastic lid or plastic wrap to create a greenhouse effect. This helps retain moisture and creates a humid environment, which is especially beneficial during the germination and early growth stages.
- Indoor Microgreen Care, Moisture Control: Consider using a humidity dome or a small humidifier to regulate moisture levels, especially if you live in a dry climate or during the winter months.
Monitoring Growth and Maintenance
You should regularly monitor the growth and maintenance of your indoor microgreens to ensure they’re developing as expected. Utilize growth tracking to observe the progress of your microgreens. If you notice any issues such as stunted growth or discoloration, consider nutrient supplementation to support their development. Troubleshooting is crucial to address any potential issues early on.
Monitor environmental conditions such as temperature and light exposure, and make adjustments as necessary. Keep an eye out for signs of pests or diseases and take prompt action if needed. Regular maintenance tasks like ensuring proper air circulation and cleaning trays or containers are also essential for healthy microgreen growth.
Preventing Common Pests and Diseases
Keep pests and diseases at bay by maintaining a clean and well-ventilated growing environment for your indoor microgreens. Here’s how to prevent common issues:
- Natural Pest Control: Introduce beneficial insects like ladybugs or lacewings to prey on harmful pests such as aphids or spider mites. You can also use neem oil or insecticidal soap as organic pest control methods.
- Disease Prevention Techniques: Practice proper watering techniques to avoid waterlogged soil, which can lead to root rot. Additionally, ensure good air circulation by using a small fan to reduce the risk of fungal diseases.
- Maintain Cleanliness: Regularly remove any dead or decaying plant material, as these can attract pests and harbor diseases. Keep your growing area tidy to minimize potential breeding grounds for pests.
Harvesting Your Microgreens
Now that your microgreens have reached the right stage of growth, it’s time to harvest them.
Knowing the optimal timing for harvest and the correct cutting techniques is crucial for ensuring the best flavor and nutrient content in your microgreens.
Timing for Harvest
Harvest your microgreens when the first true leaves appear, typically 7-14 days after sowing. This is the perfect time to capture the peak of their flavor and nutritional value.
Here’s what to do next:
- Observe the seed leaves, or cotyledons, as they initially sprout and develop. Once the first set of true leaves emerges, it’s time to harvest.
- Gently grasp the base of the microgreens and use clean scissors to snip them just above the soil level. It’s important to avoid pulling the plants out by the roots.
- After harvesting, store the microgreens in airtight containers in the refrigerator to maintain their freshness and crispness for up to a week.
Cutting Techniques
When your microgreens have developed their first set of true leaves, it’s time to cut them for harvesting. To ensure continuous growth, use pruning techniques by snipping the stems just above the soil level. This encourages the microgreens to produce a second crop, extending your harvest.
When cutting, observe the growth patterns of your microgreens. Some may have uniform heights, while others may vary. Tailor your cutting technique to each variety, ensuring that you harvest at the optimal stage of growth. By understanding the growth patterns, you can maximize your yield and enjoy a variety of flavors and textures.
Experiment with different cutting techniques to find the method that works best for each type of microgreen, allowing you to savor the freshest and most nutritious harvest possible.
Enjoying Your Homegrown Microgreens
To fully appreciate the flavor and freshness of your homegrown microgreens, it’s essential to harvest them at the peak of their growth. Here’s how to enjoy your homegrown microgreens:
- Tasting Tips:
- Experiment with different varieties to discover unique flavors, such as spicy radish or nutty sunflower.
- Enhance the taste by adding microgreens to salads, sandwiches, smoothies, or as a garnish on soups and main dishes.
- Try pairing them with various dressings, cheeses, or fruits to create innovative flavor combinations.
- Storage Options:
- Keep your harvested microgreens fresh by storing them in airtight containers with a paper towel to absorb excess moisture.
- Place them in the refrigerator and use within a week for the best flavor and texture.
- Consider growing small batches at different times to ensure a constant supply of fresh microgreens.
Enjoy the satisfaction of savoring your homegrown microgreens in creative and delicious ways.
Frequently Asked Questions
Can I Use Regular Potting Soil for Growing Microgreens, or Do I Need a Special Growing Medium?
You can use regular potting soil for growing microgreens. It’s important to choose a soil type suitable for small seeds. For best results in indoor gardening, beginners can start with a well-draining, light, and nutrient-rich growing medium.
How Often Should I Fertilize My Microgreens, and What Type of Fertilizer Is Best for Them?
You should fertilize your microgreens every 7-10 days to ensure optimal growth. Consider using organic liquid fertilizers like fish emulsion or seaweed extract, or water-soluble synthetic fertilizers for convenience and effectiveness.
Can I Reuse the Soil After Harvesting My Microgreens, or Do I Need to Start With Fresh Soil for Each Batch?
You can definitely reuse the soil after harvesting your microgreens. It’s a sustainable practice that benefits the environment and reduces waste. However, be mindful of potential issues like nutrient depletion and disease buildup over time.
What Are Some Creative Ways to Use Microgreens in Recipes, Beyond Just Adding Them to Salads?
Get creative with microgreens in your culinary creations! Elevate your dishes with these flavorful greens by incorporating them into unique presentations like wraps, smoothie bowls, sushi, and even as a topping for savory oatmeal.
Are There Any Special Storage Tips for Keeping Harvested Microgreens Fresh for Longer?
To keep harvested microgreens fresh for longer, proper storage is crucial. Extend their freshness by placing them in airtight containers with a paper towel to absorb excess moisture. Store in the fridge and use within a week for optimal taste and texture.
Author


Beginner’s Guide to Growing Your Own Vegetables

Identifying and Treating Common Plant Diseases

Container Gardening for Edible Plants

Innovative Garden Lighting Ideas for Nighttime Beauty

Tips for Controlling Weeds Without Chemicals

Understanding Soil Ph and Its Impact on Plant Growth

Maximizing Small Spaces for Urban Edible Gardens

Designing Colorful Flower Beds for Year-Round Appeal

Starting Your First Garden: A Beginner’s Guide

The Essentials of Organic Composting at Home

The Art of Growing and Caring for Roses

How to Control Garden Pests Naturally

Understanding Plant Hardiness Zones for Successful Gardening

Dealing With Fungal Infections in Plants

Landscaping With Ornamental Grasses for Texture

Improving Clay Soil for Better Gardening Results

Basic Gardening Tools and Equipment Every Gardener Needs

Companion Planting Strategies for a Healthier Garden

Creating a Fragrant Garden With Scented Flowers
